Overview
A dedicated mobile register allows your business to process payments efficiently while working outside of a traditional checkout environment. Whether you’re operating from a mobile van, attending events, or providing services in the field, configuring a separate register for mobile operations helps keep transactions organized and ensures your staff can easily accept payments on the go.
By using a mobile-specific register, you can separate reporting, streamline checkout workflows, and optimize your Point of Sale experience for tablet and mobile devices.
Why Is This Important?
Setting up a separate mobile register provides several benefits:
Keeps mobile transactions separate from in-store sales
Improves reporting and tracking for field operations
Optimizes the checkout experience for tablets and mobile devices
Allows staff to process payments quickly from anywhere
Helps maintain organized register management across multiple locations or teams
Before getting started, make sure your mobile hardware is properly configured and ready for use.
Once your iPad or tablet or phone is set up for mobile checkout, you’ll be ready to start accepting payments anywhere.
Create Your Mobile Register
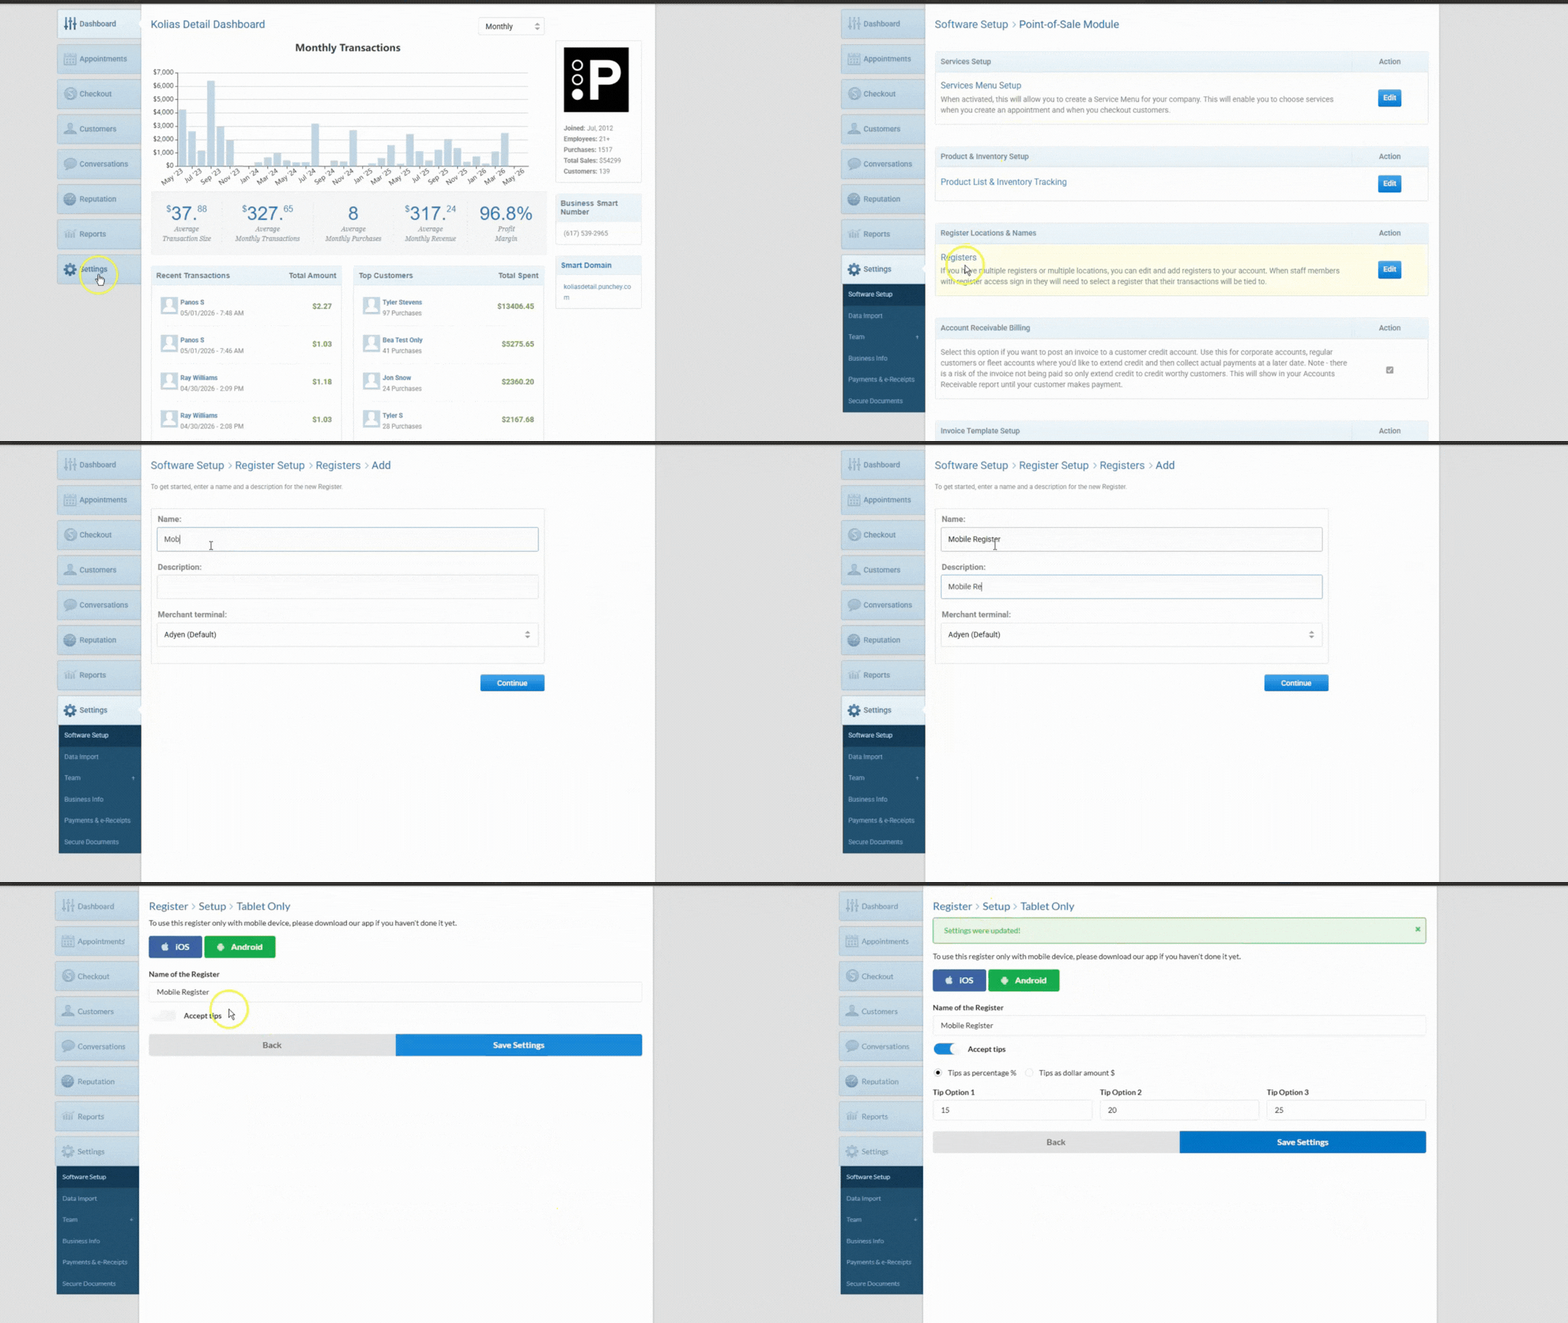
To create a new register for mobile operations:
Navigate to:
Settings > Software Setup > Point of Sale Module > RegistersSelect + Add a New Register
Enter a Register Name and Description
Example: Mobile VanSet the register type to:
Tablet Only for tablet and mobile devicesConfigure your preferred Tip Settings
Save your changes
Select Your Mobile Register
After creating your mobile register, you’ll need to set it as the default register on your mobile device.
Open the Punchey App on your mobile device
If needed, refer to this guide for downloading the correct app for your device:
Explore the Punchey AppsSelect the mobile register you created
You’re now ready to process mobile payments in the field
For step-by-step instructions on processing payments using the mobile app, refer to this article:
Was this article helpful?
That’s Great!
Thank you for your feedback
Sorry! We couldn't be helpful
Thank you for your feedback
Feedback sent
We appreciate your effort and will try to fix the article